Pages
Monday, June 27, 2011
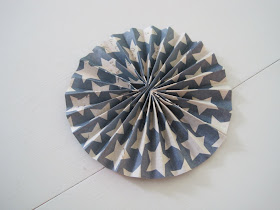
A Fourth of July Banner
Saturday, June 25, 2011
{A Week In Review}
Thursday, June 23, 2011
Kitchen Love
Sarah from Modern Country Style is hosting a wonderful link party today called Kitchen Favourites.
Have you met Sarah? If not, you simply must! Her blog is a blend of delightful writing and gorgeous photography. But the best part is she is a total sweetheart, and visiting her blog is like having a friend over for coffee...or tea! :)
Now...
The idea is to share a favorite spot in your kitchen, but I floundered a bit on this because I have more than one favorite.
Not because it is the hands down, most gorgeous kitchen ever, {it's not} but because every part of this room, every nook, took a tremendous amount of effort to get it there.
{And we are still working...Is a room ever really done?}
Some of this you may recognize, because I have shared much of it along the way as we have worked!
Ours was the ugly duckling of kitchens.
Truly.
I wish I had a true before shot of this room to show you~ before as in when we first bought this home! But maybe it's good I don't or you'd be off running for sure! ;) {The halfway pictures are bad enough!} But in fairness, I will be showing a bit of those so you can see what we changed. :)
I love standing here at the sink, and looking out the window. But it wasn't always so...Here are a few "halfway house" pictures!
Old sink, old faucet, old counters...
Working...
A lot of paint!
The window was primed and painted, just like the bead board and cabinets!
The pantry doors have a bit of personality now with their chalkboard doors!
And when our kitchen was flooded, we removed the laminate down to the vinyl floor that was there when we moved in...
But it wasn't anything a little primer and paint couldn't handle!
To read more about this painted vinyl floor, click here.
But do you see a glaring problem?
Yep, one long wall of nothingness. Not good! But that was okay, because I had an idea. An "island" of sorts, since the room couldn't accommodate a true one, was set against that long wall...
The island was made from an vintage dresser found on Craigslist...
I am working on open shelving that will go on either side of the large chalkboard, but for now the chalkboard is a little lonely up there!
But this old house, especially this kitchen, has taught me something very valuable. You do the best you can with what you have. Some things could be replaced, others we had to get creative with until we could replace them! Hopefully next summer we will replace the flooring, and someday we will rip out the old cabinets...But I got to thinking that anything I did would be better than leaving it how it was! ;)
But guess what? This is not the only kitchen you can see! So do make sure and head on over to Modern Country Style, and see every beautiful kitchen that has linked up! :)
Thanks so much for stopping by, and I hope you have a wonderful day and weekend, too!
Blessings,
Jenni
Friday, June 17, 2011
Master Bath Reveal With Bead Board Ceiling
Hello sweet friends! I hope this Friday finds you well, and ready for the weekend! Isn't it about time for a break from the weekday rush? :)
So...
Do you remember how I said that I would show you pictures of the whole master bathroom when we put the fan up? Well, having been so busy with the bedroom renovations, I just now finished most of the little touches I wanted to add to the bathroom before showing whole room photos!
{Now I still have the window treatments to make, however, and a couple of small decorations I want to make, but I'm declaring the room officially finished!}
The facts about this bathroom:
It is a 3/4 bath that I think is actually smaller than our walk-in closet.
We had already replaced all the fixtures with exception to the shower, which will be a future project. We also replaced the pocket door, old window, and flooring, as well as removed the baseboard heater. We'd added bead board and chair rail to the walls and trim around the door and window...This was the major renovation, and it looked much better than it had!
We bought two 4x8 panels of bead board from Lowe's, for about 24 per panel. I made a paper template of our ceiling, and we put it up to the ceiling to test it and make any necessary adjustments. We also marked exactly where both the light fixture and fan cut outs were.
{Ceiling before}
We traced the template onto the bead board, and used both a jigsaw and a circular saw to cut it out. {Well, actually my husband used the circular saw, the one power tool that scares me to death! I had my first try at the jigsaw. But I have to admit, I was so nervous I'd mess it up that he did most all of the cutting.}
The next thing I did was find the rafters, using a stud finder, and mark where these were on the walls so we could see where to nail once the bead board was up.
Then came the exciting part of actually putting the bead board up, but it was work! We were using one entire panel, plus a small strip of another, so we nailed the smaller piece in first, and then the 4x3 sheet.
That was the tricky part. I hammered while David held the panel up, then he hammered while I held it up!
Then came the spackling and sanding...not fun, but it looked so much better afterward!
This is how it looked after trimming it out, but before replacing the strange light fixture and old fan. I used "quarter round" for the trim between the ceiling and walls, and cut it on our table saw.
I used "quarter round" for the trim between the ceiling and walls, and cut it on our table saw.
This is how it looks now, with the new chandelier and new fan. I rather wish the fan could be somewhere other than on our bead board ceiling, but that is where it needs to be, so oh well...But compared to how the ceiling looked before, I am so much happier with how it is now! :)
One thing I have realized is that just because your bathroom is small doesn't mean it cannot be a room you enjoy being in! I was determined to make it as pretty as I possibly could. :)
So we replaced the faucet {again} with one that was much better made:
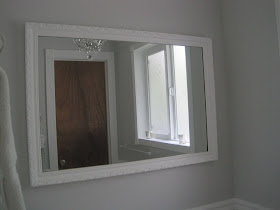
And a vintage mirror replaced the wall cabinets.
{Sewed a linen sink skirt...}
And tied chalk paint tags onto baskets...
The towel bars were sprayed white~
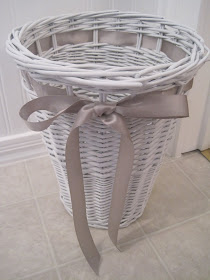
{The waste basket even got a fresh coat of paint!} ;)
So this is the bathroom before all of this:
And this is after:
{I am linking this to the following parties: Tatertots and Jello, The Shabby Nest, Under the Table and Dreaming, French Country Cottage, Chic on a Shoestring Decorating, and Funky Junk Interiors.} :)
Well, that's all for me tonight! I hope you all have a wonderful weekend, and thank you so much for stopping by! :)
Blessings,
Jenni


