Dear friends, My blog has moved!
Please visit me over at my new site!


I hope to see you there!

~Jenni


Showing posts with label chalkboard paint. Show all posts

Thursday, December 23, 2010

{Chalkboard Revisited}

A few months ago, I mentioned a project I was working on.  I knew what I wanted the finished project to look like before I began.  It just took me much longer to finish said project than I ever imagined.  

{happily ever after}

A long time ago, there was an old school chalkboard.  As a child, I used to practice my multiplication and dreaded division lessons upon it.


It used to rest upon a wall in my parents garage.


However, as the years passed and it was no longer was needed, it was removed from the wall in the garage and placed in corner space of the storage room.


Throughout the years I thought of that old school chalkboard.  Wondering where it was, and if by chance my parents still had it, and wouldn't you know they did?  What's even better is they planned to give it to me, oh yes, I was happy!  


However, to fit my motif I knew it would need a fresh coat of paint.


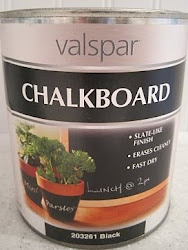
So, I purchased some chalkboard paint and began the process of painting.


 Here's a picture of the chalkboard after the first coat of paint was applied.  From that point, it ended up taking me almost three months to add the next three coats of paint.  


It is at this point, I have to say, that if it were not for my Dad, this project would still be in the garage waiting.  Thanks Dad!


While Dad cut the long pieces of molding into four pieces, that would soon make the frame for the chalkboard, I watched and learned.   So should I ever want to make another frame from molding, I will know what I am doing.


After the pieces of molding were cut to the correct size, I painted a coat of primer to the molding...


...and after that, I added a coat, of one of my many favorite shades, of brown paint, by Valspar.  


I had a bit of difficulty taking a photo that showed the updated chalkboard in all its new found glory, here is a close up.


Here is a photo where you can see the entire chalkboard. 


The color of the frame is best seen in the photo above. 


So at long last, this project is, ces't fini!  This is also the point, at which, I admit painting isn't my passion.  I {Belle} think I'll go back to posting about cooking fantastic dinners and my new found passion, floral arrangement.   A big thank you to Jenni {Sparrow} for the idea of using molding for the frame and to my husband for getting that heavy piece of art on the wall and off the dining room floor.  Well, that's all for now, blessings ya'll, and Merry Christmas!

simply . living . life

Friday, November 5, 2010

From glass to chalkboard...

 UndertheTableandDreaming
{This chalkboard was featured here}

Hi everyone! I hope that your weekend is off to a fantastic start! I don't know about you, but I am SO glad it's finally Friday... :)
I want to share with you a little project I am very excited about...
I have been looking for a very large picture frame that I could use to make a chalkboard for the long, empty wall above the "island" in our kitchen. My intention was to take out the glass and replace it with the thin craft birch I use for my chalkboards...
Then about a month ago, I happened upon a blog (I cannot remember which one) where the blogger mentioned in passing a friend who had used chalkboard paint on the glass in a frame. Unfortunately, I also cannot recall the name of the friend. Alas, this means I cannot give credit where credit is due, which drives me crazy! I even googled it, but couldn't find it...but if I do, I will edit this post!
So anyhow, when I saw these frames for a steal at Goodwill a couple of weeks ago, of course I put all three in my cart!


I have plans for the other two, but knew right away one of the large ones would be a chalkboard! :)


After cleaning the glass, I placed it on my little painting table, spray priming it twice. {I used Valspar's grey primer; it is truly tough as nails!}


After the primer dried, I sprayed it with chalkboard paint. After two coats, I ran out of the spray paint and went to Michael's craft store to buy more.
Unfortunately, it wasn't until I got home that I noticed I'd bought green chalkboard paint.
{Please feel free to omit these past two steps. I wish I had.}
So, being rather in a hurry to complete this project, I brought out the brush-on variety...

{love this stuff!}

I did four or five coats of this, because I was putting it on glass, and wanted a strong chalkboard base.


I also primed and painted the frame white...


Carefully put the glass into the frame...


And finally it is up on the wall!


{Now when the kids wonder what is for dinner, they can look at the "menu"!}


I would ordinarily prefer it hang horizontally; however, I am working on something that will take up both sides of the chalkboard, and I need all of that space! Right now, it looks a little odd, I know- smack dab in the middle of the wall- but in the end it is going to look just perfect where it is...so stay tuned on this!


It is a little bit of a pain having to climb up on top of the "island" to write the menu, but not too much. It is worth it, because it is right where I always hoped to put a chalkboard...
And just a quick, little side note...I wanted to show you what I found at a garage sale this summer for just three dollars...


I thought my heart had stopped when I saw this metal basket. And the wood handle just about did me in. It is a reproduction, but oh how I love it!
Well, I hope you all have a fantastic weekend! Thank you so much for visiting!
Blessings,
Jenni
I am linking this to:

Sunday, September 12, 2010

The Chalkboard Pantry Doors


Last summer (2009) I found this picture


at Better Homes and Gardens, while searching for kitchen inspiration pictures. Of course, I must admit to wishing my pantry was as big as this, but it is what it is! It doesn't mean, however, that it has to be either ugly or boring! ;)

(Which it was.)


Here is a "before" picture of our pantry doors. I actually finished the doors last February, and posted on them at my other blog, Nest to Keep. BUT, I learned something important:

If you use green chalk, and then, while trying to clean it off, smear it on the white trim, it makes the trim green. Permanently.

So being the perfectionist I am, I repainted them. So here they are, "take two"!


There is a "grooved" design around the edges of the cabinet, which separated the chalkboard from the "trim" around the outer part, which I painted white. It is really difficult to make a clean, crisp edge between the two colors.


But that's where this came in:


Have you seen these paint pens you can buy?
They saved my life. Practically.


I used the black, medium tipped ones and they were able to make a clean line dividing the chalkboard paint from the white part. (It was a lot harder to do with the doors already hung up. It was a cleaner and crisper line the first time around when I painted them while they were laid flat on a table, but I eventually just had to call it "good enough".)


And then I hid all the green chalk.


Here below is a better picture of the doors, although I don't think it's the best picture of the kitchen itself! You can see all I am still working on, including the crown molding! And our very ugly stove to the left of the pantry...but the good news is my husband is just about to start rewiring our "new" vintage stove we will be installing! (Hopefully this fall, if everything goes well!)


Oh, and yes, I changed my mind about the bead board on the back of the upper cabinets...

(Again.)

I am repainting them white, and I love it so far! It feels so much cleaner and open!

I am linking this to:

Under the Table and Dreaming

Between Naps on the Porch

Domestically Speaking

The Shabby Nest

Tatertots and Jello


Well, that is all for me for now! I sure do hope you all had a fantastic weekend! Thank you for taking the time to stop by!

Blessings,

Sparrow


Wednesday, September 8, 2010

Something old...

...something new.

So Sparrow's been holding down the fort here at {Beautiful Nest} for awhile, so I decided to jump in and show you all one of the projects I've been working on.

Now since I have four little ones, five years old and younger, from start to finish my projects tend to take ten times longer than my sister, Sparrow's. Good news is she assures me in time that as the kids grow I will be able to accomplish things faster.

I hope so.

Since it took me all day to clean the house. My really little house!

Though this before and after project isn't complete yet, I thought I would share with you a glimpse of what it is and what I hope it will become.

Now by now, you probably know I adore chalkboard paint! As a momma of little ones I also love the idea of having a wall my kids can scribble upon. Seriously what's not to love? However since we rent and do not own, I can't very well paint the walls so what's a girl to do?


When I was younger this chalkboard was mine and my parents recently gave it to me. {Neat aye?} My first thought was oh my goodness, I know exactly what I can do with this!

Now in my upcoming post I share details, details, details, but this post is like a trailer for a movie. Its just a juicy snippet of what's to come. So without further ado...my project.


After I finish painting this, me and the chalkboard are on our way to Sparrow's where she will show me how to add the finishing touches.

Thank the Lord for sisters!

So...did reading this inspire you to come back to see the the transformation? I sure hope so. In the meantime I hope you all have a fantastic week. Blessings!

belle
simply . living . life