
Hi sweet friends!
How is your week going? I hope this second week of January is going well for you all! :)
I wanted first to say thank you for all of your kind comments on my previous post! I so much appreciate each of you, and the encouraging words you take the time to leave! :) I will be by to say hello to you all, and to catch up on what you have been up to this past week! I guess you could call the last week and a half another wash out~ between getting back into the swing of things last week, and my husband being away on a business trip this week, it has been a little crazy around here! Thankfully, David is back home now, and I am so glad! :)
So anyway...today I have a little something to show you...
Last April, I planned this project out, but just finished it this week! And although technically I didn't actually start those plans until this fall, how's that for a project taking forever to complete?
Now you are probably picturing a full kitchen remodel, or at least a living room renovation, and it's true we do have those going on right now. But that is not the project I am talking about...
No, this involves an old window...
and some galvanized sheet metal.
I first noticed this sheet metal while at Lowe's a year and a half ago. I mean, really noticed it. I love this stuff!
You can buy it in large pre-cut pieces, but it costs an arm and a leg. I believe you can also have it cut to your specifications, if you'd like, though I am not sure of the cost.
But...you can also buy large rolls of it in different widths and lengths, and it is affordable. SO much kinder to the pocket book.

In this case, my window had vertical panes, and so I only needed narrow strips of galvanized metal.
 {Old window before}
And...
 {Old window after}
{What you will need}
old window frame, minus the glass
galvanized sheet metal
5/8 inch nails, with large heads
work gloves
canvas drop cloth or old towel~ for protecting your work space
black Sharpie, or other permanent marker
ruler
large straight edge ruler
*Deco Art Slate Grey acrylic paint
*Deco Art Snow (Titanium) White acrylic paint
Paint brush
Old plastic container
measuring tape
tin snips
hammer
slotted screw driver
pliers
*Gorilla Glue Precision Glue Pen~ if needed
{How to}
My window was already missing its glass panes...If the glass in yours is still intact, you will need to break it out. Make sure to use eye protection and work gloves while doing this!
{If your window is just one square frame, then you will have to purchase a larger sheet of galvanized metal.}

On the back side of the window, there will most likely be an old layer of glazing putty around the edges of each window "pane". This is what is used to secure and seal each glass pane in these old windows, and will look just like the wood at first glance. This needs to be removed so that your piece of metal will fit into the space properly. It comes off easily with a chisel, and will break off into pieces like in the above picture. It may take a trace of wood off with it, but this won't be a problem.
On my window, the top part on one of the strips of wood~ I'll just call them "panes" for reference~ was loose. I used a little Gorilla Glue underneath the loose part to fix this, and clamped it for about a hour and a half. This kind dries white and is perfect for small or tight spaces.

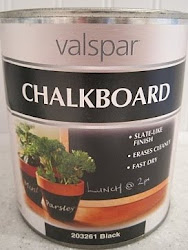
After you sand and clean your window, you're ready to prime it! I used Valspar's gray primer spray paint...

Now the fun part...playing around with colors to find the perfect hue!

I wanted a light gray color, because all of the walls and our fireplace are white. I mixed and tested, and finally decided used approximately 4 oz. of Snow (Titanium) White by Deco Art and 8 teaspoons of Slate Grey, also by Deco Art, to make my shade of gray.

I love this color Slate Grey! I wish they sold it by the gallon!
 {Large craft sticks that look like tongue depressors make the best stir sticks for small containers...who knew?}
 {If you see it isn't completely painted down the sides, this was taken before it was completely finished!}
Once you have painted your window, place it so the back side is facing up. If you bought the roll of sheet metal, you will need to measure the width and length of each "pane" of your window. I subtracted about 1/16 inch or so from my measurements, to allow for a little give when placing the metal inside the pane.

{If your window has no panes, then simply measure the width and length of the frame, and skip down to where we will be actually attaching the sheet metal to the window frame! :) }
Now I was a very bad girl and did not use work gloves while cutting the metal, and have a nasty cut to show for it now! However, I felt more in control while cutting it without bulky gloves. In good conscience, however, I have to tell you that the edges of the sheet metal are very sharp, so you may want to use some leather work gloves. ;)

Look at all of that gorgeous shiny metal! Love it! When you roll it out, decide which side you think looks the best. I felt the inside of the roll looked the nicest, so that is what I used.

I measured on both sides of the top of the piece of metal, and made little marks with my Sharpie.

I used a simple ruler to draw my line where the marks were. This way you get an correct measurement and an even line to cut on.

Use your tin snips to cut in the middle of your line...


Then you just do the same thing to measure the width~ measuring and marking the top and bottom of your metal piece.

I used a long straight edge ruler to draw the vertical line...

Now it's time to nail the metal onto the window. Out of all the nails, I found the 3/4 inch by 18 nails worked the best. These have a larger head on them, that makes it easier to work with.


I didn't actually nail the metal into the window frame. Instead I hammered the nails into the wood so they were like clips holding the metal in place.
There are two ways to do this, depending. The best way is to hammer your nail laying flat, directly into the side of the window frame or pane, and tap it until it is securely in the wood, about a fourth of the way in. It will look about like this:

While hammering, you can use pliers to hold your nail in place if it is difficult. When nailing into one of the pane strips of wood, nail carefully so as not to split the wood. Also, I found by hammering only until the nail is securely in place, the nail wouldn't stick out through the other side, which would not be such a good thing! ;)

The other way is to hammer the nail in at an angle, into the slot between the metal and the wood, like this:

Test it to make sure it is secure, and then, using your pliers, carefully bend it over flat.

Either way you do it, you want the nails to be laying flat, close to the metal, but not touching it.

Continue nailing it along the window frame. You can look at it from the other side as you go, and test it to see if it is secure. Some places may need more nails than others to get it to look right.

Then just repeat the whole process of measuring and cutting your metal, and nailing it in place, until it is finished.

And then you have it~ a fun piece of wall art...

Or in this case, mantel art. ;)

I like how it fills in the large space of brick above the mantel...


Up close and personal...

And with tall candlesticks on either side...


In this case, my window had vertical panes, and so I only needed narrow strips of galvanized metal.
 {Old window before}
And...
 {Old window after}
{What you will need}
old window frame, minus the glass
galvanized sheet metal
5/8 inch nails, with large heads
work gloves
canvas drop cloth or old towel~ for protecting your work space
black Sharpie, or other permanent marker
ruler
large straight edge ruler
*Deco Art Slate Grey acrylic paint
*Deco Art Snow (Titanium) White acrylic paint
Paint brush
Old plastic container
measuring tape
tin snips
hammer
slotted screw driver
pliers
*Gorilla Glue Precision Glue Pen~ if needed
{How to}
My window was already missing its glass panes...If the glass in yours is still intact, you will need to break it out. Make sure to use eye protection and work gloves while doing this!
{If your window is just one square frame, then you will have to purchase a larger sheet of galvanized metal.}

On the back side of the window, there will most likely be an old layer of glazing putty around the edges of each window "pane". This is what is used to secure and seal each glass pane in these old windows, and will look just like the wood at first glance. This needs to be removed so that your piece of metal will fit into the space properly. It comes off easily with a chisel, and will break off into pieces like in the above picture. It may take a trace of wood off with it, but this won't be a problem.
On my window, the top part on one of the strips of wood~ I'll just call them "panes" for reference~ was loose. I used a little Gorilla Glue underneath the loose part to fix this, and clamped it for about a hour and a half. This kind dries white and is perfect for small or tight spaces.

After you sand and clean your window, you're ready to prime it! I used Valspar's gray primer spray paint...

Now the fun part...playing around with colors to find the perfect hue!

I wanted a light gray color, because all of the walls and our fireplace are white. I mixed and tested, and finally decided used approximately 4 oz. of Snow (Titanium) White by Deco Art and 8 teaspoons of Slate Grey, also by Deco Art, to make my shade of gray.

I love this color Slate Grey! I wish they sold it by the gallon!
 {Large craft sticks that look like tongue depressors make the best stir sticks for small containers...who knew?}
 {If you see it isn't completely painted down the sides, this was taken before it was completely finished!}
Once you have painted your window, place it so the back side is facing up. If you bought the roll of sheet metal, you will need to measure the width and length of each "pane" of your window. I subtracted about 1/16 inch or so from my measurements, to allow for a little give when placing the metal inside the pane.

{If your window has no panes, then simply measure the width and length of the frame, and skip down to where we will be actually attaching the sheet metal to the window frame! :) }
Now I was a very bad girl and did not use work gloves while cutting the metal, and have a nasty cut to show for it now! However, I felt more in control while cutting it without bulky gloves. In good conscience, however, I have to tell you that the edges of the sheet metal are very sharp, so you may want to use some leather work gloves. ;)

Look at all of that gorgeous shiny metal! Love it! When you roll it out, decide which side you think looks the best. I felt the inside of the roll looked the nicest, so that is what I used.

I measured on both sides of the top of the piece of metal, and made little marks with my Sharpie.

I used a simple ruler to draw my line where the marks were. This way you get an correct measurement and an even line to cut on.

Use your tin snips to cut in the middle of your line...


Then you just do the same thing to measure the width~ measuring and marking the top and bottom of your metal piece.

I used a long straight edge ruler to draw the vertical line...

Now it's time to nail the metal onto the window. Out of all the nails, I found the 3/4 inch by 18 nails worked the best. These have a larger head on them, that makes it easier to work with.


I didn't actually nail the metal into the window frame. Instead I hammered the nails into the wood so they were like clips holding the metal in place.
There are two ways to do this, depending. The best way is to hammer your nail laying flat, directly into the side of the window frame or pane, and tap it until it is securely in the wood, about a fourth of the way in. It will look about like this:

While hammering, you can use pliers to hold your nail in place if it is difficult. When nailing into one of the pane strips of wood, nail carefully so as not to split the wood. Also, I found by hammering only until the nail is securely in place, the nail wouldn't stick out through the other side, which would not be such a good thing! ;)

The other way is to hammer the nail in at an angle, into the slot between the metal and the wood, like this:

Test it to make sure it is secure, and then, using your pliers, carefully bend it over flat.

Either way you do it, you want the nails to be laying flat, close to the metal, but not touching it.

Continue nailing it along the window frame. You can look at it from the other side as you go, and test it to see if it is secure. Some places may need more nails than others to get it to look right.

Then just repeat the whole process of measuring and cutting your metal, and nailing it in place, until it is finished.

And then you have it~ a fun piece of wall art...

Or in this case, mantel art. ;)

I like how it fills in the large space of brick above the mantel...


Up close and personal...

And with tall candlesticks on either side...


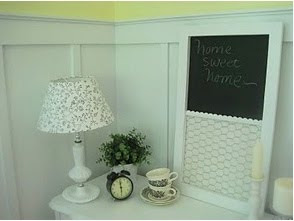
SO...what do you think? I should mention that galvanized metal is a wonderful way to have a unique memo board, since it is magnetic; I just opted to put it above the fireplace instead! :)
{I am linking this to The DIY Club Project party, the monthly contest.}
I am also linking this to:
French Country Cottage
The Shabby Nest
The Shabby Chic Cottage
Tatertots and Jello
Along for the Ride
Funky Junk Interiors
Under The Table and Dreaming
Sew Chatty
Coastal Charm
Perfectly Imperfect
Crafting with the Stars at Sew Dang Cute.
I hope you are all doing well, and have a wonderful Thursday! :)
Blessings,
Jenni


.jpg)


41 comments:
absolutely LOVE it!
Oh Jenni, it looks fantastic! Would you believe I just bought a four pane French window a couple of days ago at the salvage yard and I have been thinking about how I was going to do with it.... You have given me some wonderful inspiration once again! X
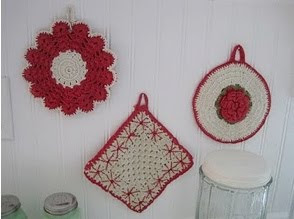
Beautiful Jenni!! What a great idea and I love the shine and texture it has as well next to your soft wreath!!
I love it! What a great idea! Gonna have to do this one.
Fabulous tutorial! Thank you for this it's stunning.
Ah, a girl after my own heart!!! Anytime I hear galvenized, I think farm...But this is so chic! I love what you have done, this is pure genius, and to put it on that mantle and the loving touches added? YUMMY!!!! This is just so beautiful! Cool, but ultra rich and warm! Great job and great tutorial Jenni!!!!
So Shiny! I like the wreath idea! :)
Hi Jenni!
Glad your hubby is home and your week is off to a good start!
I never know what to do with the old windows that have missing or broken glass, until now! Wow, love this! It has an industrial shabby chic feel! The softness of the wreath and the metal really compliment each other. Great job!
Have a wonderful day, friend!
;D Michelle
Great project. It would also be cute to attach some photos with magnets to the metal.
-Danielle
Putting the galvanized metal behind the old window was a brilliant idea! I love all the soft grays and sparkly silvers on your mantel. Such a lovely winter display!
Danielle, that is a fantastic idea of adding photos with magnets. I had originally intended to use it as a memo board with magnets, but had not thought of adding photos! I am off to try this idea out! Thanks for the stroke of genius! :)
~Jenni
That is a really neat idea! It looks great!
Jenni
What a great Idea, and I loving galvanized anything, this is right up my ally!
I love the idea of being able to add decorative magnets to the window panes for added collective beauty.
Jenni what a beautiful future holiday display for cards, a perfect wall hanging for a magnetis board in a office or kitchen staying in keeping of our love of euro chic and shappy cottage, farmhouse.
You are a creater of great ideas girl.
Keep inspiring us all :)
Blessings to you and yours.
PS. I have been meaning to ask you how is your sister doing these days?
xoxo
Dore
This is just so darn clever. You do such fun and interesting things. I have given you an award. Come over to check it out.
CAS
Flippin' outstanding! Gorgeous, with a designer look, and I REALLY love that you did your craft shopping at the hardware store.
I would have never thought of this! It is gorgeous!!
what a great and creative idea! beautiful too....hmmm thinking about where I can do this...
A lot of time and effort went into this project with a stunning result. Well done! Enjoy. :)
LOVEEE this!! Thanks so much for stopping by my blog--> you are awesome.
Emily
TheToastedCoconut.blogspot.com
What a fabulous idea! I love the gray with the galvanized metal. I love it with the gray wreath and the mercury glass candlesticks. Beautiful!
i adore this project! adore.
and the results are stunning. just amazing.
thanks for sharing!
Very Cool Look! The first time I used galvanized metal was to make a "Barn Star" Christmas tree topper. It came out very cute and the metal is pretty easy to work with. Love it the window!
Fab tutorial and very original project! And what a sweet magnetic board that would make too!
Donna
That is gorgeous!
I have been dying to add a vintage window frame over my couch!! I love it on your mantle!! Thanks for the tutorial!
get out!!! I absolutely LOVE this, what a great idea
Love it! Thanks so much for linking up to Made with Love Monday at Sew Chatty! Want to hear something funny??? We redid our fireplace this weekend with an old window too! The post will be up tomorrow so you'll have to check it out!
That came out fabulous. What a good idea.
Hi there~ I absolutely love this project! It came out beautiful~ New follower here! Stopping by from SNS- nice to meet you! :)
Wow. It's gorgeous! I love old windows and this is so unique. Great tutorial too! :)
Roeshel
Hi there~ Just stopping back over to say thanks so much for coming by and sharing this at Feathered Nest Friday! :)
This is gorgeous--angels singing--birds chirping--GORGEOUS I say.
Cheri
Wow -what a creation! Perfect tutorial, thank you! I love sheet metal too, especially when it comes in the form of a dryer vent! Saved my life last week, as our household cannot function for more that 2... maybe 2 days without the dryer. :)
Check out our TOP 10 Post and b e sure to check out EXCITING CHANGES at THE DIY CLUB post as well--REALLY EXCITING!!
Cheri
This is a fantastic project!!! I just love it! I had to feature it in my latest post on Galvanized Metal project ideas! And I love the magnetic tip! Good stuff!
Love what I see. I just became a follower so I'll take a longer look tomorrow.
Cheers!
Rita
I love this project! Makes me think of starting the same work immediately. Hehe! Good thing I still have the old window frames that were replaced last month. Thanks for sharing this post! I'll follow the instructions and hope to end with a cute decoration like yours. Thanks again! :)
Merrill Pride @ LoveYourWindows.com
What a great idea and I love the galvanized metal! Thanks for sharing this post and I plan on doing this myself
I stumbled your website and I am loving your DIY tutorials.
luxury replica bags r39 h8t74h2t83 high end replica bags n76 f7k78e8w56 replica bags buy online i82 s1l57k3f03
"I've recommended your blog to all my friends and colleagues because it's simply outstanding. Your ability to simplify complex concepts and make them accessible to everyone is a rare talent. You've certainly earned a dedicated reader in me!"
Walmart Air Mattress Return Policy
Post a Comment