
Hello sweet friends! I hope this finds you having a beautiful day! :)
Now in the last post, I shared a yarn wreath with flowers made from doilies, and promised a tutorial on how to make them.


Although making these flowers is fairly straightforward, I found that showing it by photos was not. It is a wee bit tricky to show what is going on, but it is not a difficult flower to make. I took some pictures over, so you will notice background changes here and there! But if you'll bear with me, I think we can make a go of it!
;)

For these {miniature doily flowers} you will need small doilies~ I used ones that measured about three inches diameter. But if you cannot find them this small, you can always use some that are just a little bigger, and still achieve this look. :)
To begin, lay your first doily out.

{Lay your second doily on top, but rotate it slightly from the one on bottom. This will give it a more layered, flowered look.}

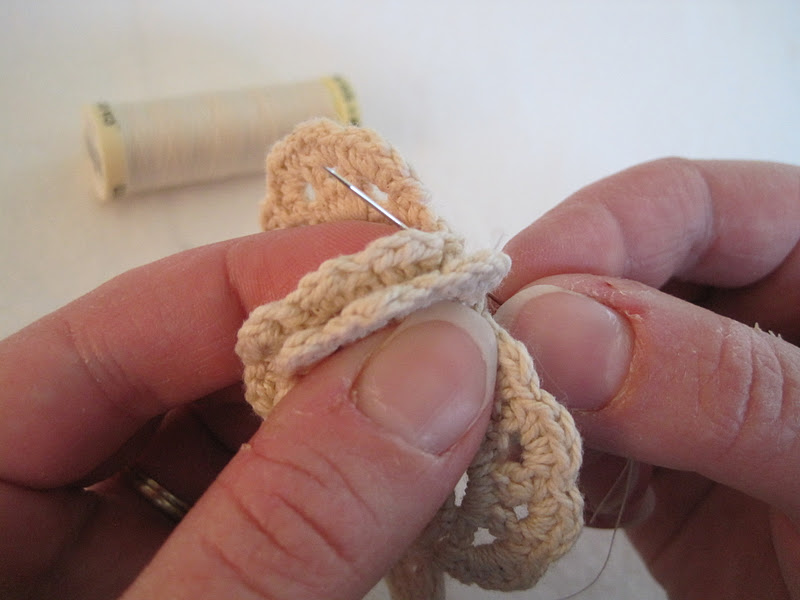
With matching thread,

begin sewing, starting at one point on the tiny "circle" in the center of the doily, and sewing completely around it. Remember to make a double knot at both the beginning and end of this process, so the stitching won't pull out!

;)

For these {miniature doily flowers} you will need small doilies~ I used ones that measured about three inches diameter. But if you cannot find them this small, you can always use some that are just a little bigger, and still achieve this look. :)
To begin, lay your first doily out.

{Lay your second doily on top, but rotate it slightly from the one on bottom. This will give it a more layered, flowered look.}

With matching thread,

begin sewing, starting at one point on the tiny "circle" in the center of the doily, and sewing completely around it. Remember to make a double knot at both the beginning and end of this process, so the stitching won't pull out!

{Now if you haven't done this before, I will tell you what I do. I can't claim this is what a true seamstress would do, but it is what works for me.} :)

To make your double knot, sew from the top doily down to the bottom doily, then pull your needle back up out of the top doily again, but only just. Meaning do not pull the thread all the way back out to the top, just the needle itself: when you look underneath your doilies, you should see a little "loop" of sorts. Now turn your needle back down, pushing it down through the two doilies, and through the loop, pulling your thread tight.

Once you repeat this, you will have your double knot. If you are a worried sew(er) like I am, {versus a sewer} you might even do it three times, and then you really know it won't come loose! ;) This is the same process for ending your stitch when you come to the end of the little circle!
Then take the middle of each "petal" on the top doily and sew it, making a knot onto the part of the doily behind it, that little "dip" between each of the two petals on the bottom doily, right here:

Continue to do this with each middle between the petals of the top doily, until you have made your way around the doily and all knots are tight!
To make the top flowered part {that goes on top of the two doilies you just sewed together} you take one doily,

fold it in half,

then in half again. But when you open it just a little, it should look like this:

You want that part you see in the center to be the middle of your flower. To get this, bring the top and bottom of the right side of the folded doily together. Adjust the "center" part as needed until it is square in the middle of your "flower", like this:

You will need to sew the flower closed, by sewing on both the left and right side. On the right, there will be a gap down the side. Sew down the side of the flower {just to the right of where I am pinching together the very "center" fold of the flower}.

{If you look closely, you can see where my needle is starting: just to the right, and underneath of, the "center" I'm holding with my fingers. You don't want to sew the "center" together, just beneath it to the side, and down to the bottom of the gap.}

This is a side view of the "gap" you are sewing together. You can also sew it from top to bottom, if that is easier.}

Once you are done with the right side, you will need to sew the other side of your flower.
So let's take a look at it again:
Bring the "dip" between the two outer "petals" on the left side together with the dip between the two inner petals on that same side, and make firm knot right in the center of those "dips". This is where I do several knots, actually! You will need more than just two here!

{Now the top part of your flower is done, but you will need to sew it onto the other part now.}
Center it onto the other doilies you sewed together, and sew down through the top of each corner of the four petals {of the top part of your flower} making firm knots until secure.
Now for extra fullness, I took that "dip" between the two petals on the top part of the flower, and brought it together with that little dip between the top two petals on the middle part of the flower. I knotted it there. Then I did the exact same thing with the bottom of the flower,
bringing that little part between the two petals on both the top and middle layers together and stitching tightly.
Then take the middle of each "petal" on the top doily and sew it, making a knot onto the part of the doily behind it, that little "dip" between each of the two petals on the bottom doily, right here:

Continue to do this with each middle between the petals of the top doily, until you have made your way around the doily and all knots are tight!
To make the top flowered part {that goes on top of the two doilies you just sewed together} you take one doily,

fold it in half,

then in half again. But when you open it just a little, it should look like this:

You want that part you see in the center to be the middle of your flower. To get this, bring the top and bottom of the right side of the folded doily together. Adjust the "center" part as needed until it is square in the middle of your "flower", like this:

You will need to sew the flower closed, by sewing on both the left and right side. On the right, there will be a gap down the side. Sew down the side of the flower {just to the right of where I am pinching together the very "center" fold of the flower}.

{If you look closely, you can see where my needle is starting: just to the right, and underneath of, the "center" I'm holding with my fingers. You don't want to sew the "center" together, just beneath it to the side, and down to the bottom of the gap.}

This is a side view of the "gap" you are sewing together. You can also sew it from top to bottom, if that is easier.}

Once you are done with the right side, you will need to sew the other side of your flower.
So let's take a look at it again:
Bring the "dip" between the two outer "petals" on the left side together with the dip between the two inner petals on that same side, and make firm knot right in the center of those "dips". This is where I do several knots, actually! You will need more than just two here!

{Now the top part of your flower is done, but you will need to sew it onto the other part now.}
Center it onto the other doilies you sewed together, and sew down through the top of each corner of the four petals {of the top part of your flower} making firm knots until secure.

Now for extra fullness, I took that "dip" between the two petals on the top part of the flower, and brought it together with that little dip between the top two petals on the middle part of the flower. I knotted it there. Then I did the exact same thing with the bottom of the flower,
bringing that little part between the two petals on both the top and middle layers together and stitching tightly.

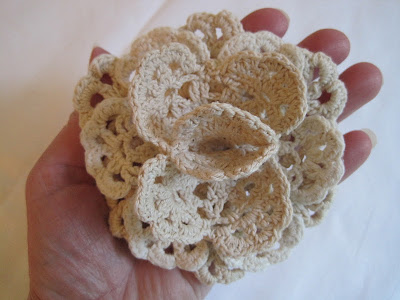
{A little crocheted doily flower!}


.jpg)


12 comments:
I think I am now caught up on all your amazing projects (it is easy to get behind in this crazy busy world!) and I love this tutorial! You are such an inspiring friend! I love how you did this wreath and I am thinking of how I will do one too! I have a great stash of doilies so all I need is some free time!!! Happy week dear! God bless! X
That is beautiful and such a great use for all our mom's and gran's old doily's that are ripped, stainned or we just want a beautiful wreath. I will be making one of these for my bedroom!!
Pretty little roses. I have used the tecnique earlier on some of my roses.Crochets are so versatile and pretty:)
Love the doily flower : )
Obrigada por partilhar tanta coisa linda. Adorei o seu blog.
Tomei a liberdade de fazer uma grinalda parecida.
Dia feliz para si.
This looks like a great tutorial! I was at your other blog just a bit ago and found it very interesting too!
I am going to have to check out how you did that kitchen floor, and your kitchen is gorgeous!
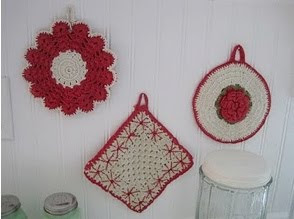
My Sister lives in Mercer Island and I spent nine days there last January. Wish I could have found where you purchased those gorgeous vintage looking red and cream pot holders! Love those!!
Blessings !! And thank you for your sweet comment!
oh Sis has a fixer upper too!
This is a wonderful tutorial, the wreath looks so soft and lovely.
Oh my gosh these are so pretty and your wreath is beautiful! Thank you for the tutorial!
xoxo
I'm going to be checking my favorite thrift shop regularly for a pretty doily ~ these would be great on pillows!!!
Aimee @ ItsOverflowing
Jenni,
Ahhhh...I just love this...thanks for giving me an idea:)
Blessings,
Linda
Love your doily flowers so much that I had to pin them! Wonderful project!
Post a Comment