
A few months ago, I mentioned a project I was working on. I knew what I wanted the finished project to look like before I began. It just took me much longer to finish said project than I ever imagined.

{happily ever after}
A long time ago, there was an old school chalkboard. As a child, I used to practice my multiplication and dreaded division lessons upon it.

It used to rest upon a wall in my parents garage.

However, as the years passed and it was no longer was needed, it was removed from the wall in the garage and placed in corner space of the storage room.

Throughout the years I thought of that old school chalkboard. Wondering where it was, and if by chance my parents still had it, and wouldn't you know they did? What's even better is they planned to give it to me, oh yes, I was happy!

However, to fit my motif I knew it would need a fresh coat of paint.

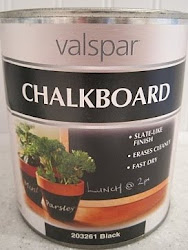
So, I purchased some chalkboard paint and began the process of painting.

Here's a picture of the chalkboard after the first coat of paint was applied. From that point, it ended up taking me almost three months to add the next three coats of paint.

It is at this point, I have to say, that if it were not for my Dad, this project would still be in the garage waiting. Thanks Dad!

While Dad cut the long pieces of molding into four pieces, that would soon make the frame for the chalkboard, I watched and learned. So should I ever want to make another frame from molding, I will know what I am doing.

After the pieces of molding were cut to the correct size, I painted a coat of primer to the molding...

...and after that, I added a coat, of one of my many favorite shades, of brown paint, by Valspar.

I had a bit of difficulty taking a photo that showed the updated chalkboard in all its new found glory, here is a close up.

Here is a photo where you can see the entire chalkboard.

The color of the frame is best seen in the photo above.

So at long last, this project is, ces't fini! This is also the point, at which, I admit painting isn't my passion. I {Belle} think I'll go back to posting about cooking fantastic dinners and my new found passion, floral arrangement. A big thank you to Jenni {Sparrow} for the idea of using molding for the frame and to my husband for getting that heavy piece of art on the wall and off the dining room floor. Well, that's all for now, blessings ya'll, and Merry Christmas!
simply . living . life


.jpg)


8 comments:
looks very nice......Merry Christmas
what a great idea -i love how you decorated the chalkboard
Oh, it looks great! The molding really spruced it up, along with the switch from green to black. I love it!
Hannah
I L.O.V.E. it! That molding is wonderful. You did a great job!!
Have a blessed Christmas!
Nancy
It looks great!
I love chalkboards and magnets, so also made a large one from a cheap picture frame I got from hobby lobby for $20, had a piece of sheet metal cut for $30 and chalk board paint for $10. It hangs in my hallway and gets decrated for every holiday and birthday. My husband even put a timer ligtht switch so I could add lights. let me know what you think?
http://kimberlycb101.blogspot.com/2010/12/lights-action.html
I *love* getting things from my parents from when I was little. It makes my home feel more like a home when I have stuff that reminds me of my parents' house. Secure and safe!
I'm enjoying looking back at your past posts. It feels like a nice way to get to know you better. I love the colours you like. Right up my alley!
Sarahx
Post a Comment