Dear friends, My blog has moved!
Please visit me over at my new site!


I hope to see you there!

~Jenni


Monday, November 29, 2010

Advent:The Lighting of the First Candle


Do you celebrate Advent?

{Two years ago, we as a family began the Christmas tradition of celebrating Advent. Each Sunday night of the Christmas season, we light a candle on the Advent wreath~ each candle with its own name and meaning. This is something we do in church each Sunday, but I wanted to do it at home as well. I have shared this on my "Nest to Keep" blog both years, but wanted to share it here at Beautiful Nest this year. For next week, I will have my Advent wreath unpacked and set up. I am still rummaging through the Christmas decoration boxes, so we have a makeshift candle this week.....}

*******************

{The first candle is the Prophecy candle.}


When we light this candle, we are in anticipation of Christ's birth. We remember that, long before He came, God gave His promise~ the promise of a Savior who would truly change the world. No longer would we live separated from God by our sin, and no longer would death have the last say.

"For unto us a child is born, to us a son is given, and the government will be on his shoulders. And he will be called Wonderful Counselor, Mighty God, Everlasting Father, Prince of Peace."
~ Isaiah 9: 6


O come, O come, Emmanuel,

And ransom captive Israel,

That mourns in lonely exile here

Until the Son of God appear.

{Rejoice! Rejoice!

Emmanuel

Shall come to thee,

O Israel!}

~Words: Latin, c. 12th century; Music: Plain song, v. 13th century


**********************


Normally I will do these Advent posts on Sundays. Due to sickness, I had to postpone this one!

I hope you all are having a wonderful week so far, and thank you so much for coming by!


Blessings,

Jenni

The giveaway extended

Just an update~

We have decided to extend our giveaway until Wednesday, December 1, at 11:59 p.m. PST.


Click here for your chance to win one of two of these bookazines! We will be announcing the winners on Thursday the 2nd...


Saturday, November 27, 2010

Tag and twine ornaments {with book pages}

Hi friends! I sure hope you all had a wonderful Thanksgiving, and are enjoying this long weekend! :) Did you eat too much like I did? ;)

Well, now that Thanksgiving weekend is coming to a close, I thought I would show you these ornaments I made...

I first saw this picture from Country Living at Katie's blog, On the Banks of Squaw Creek, and was inspired!


{Do you see that amazing galvanized tub? I took one look at that, and decided our tree was going to sit inside one of those this Christmas!}


And those sweet tags hanging from the tree...I had card stock I'd purchased last year, intending to make tags similar to this to tie onto Christmas gifts, but never did.

{The story of my life.}

But seeing this picture, of course I had to make tag ornaments!


I used the pages of an old dictionary for some of them...


and the pages of an ordinary book for others...


These are so simple they almost don't need a tutorial, but I am going to do a little one anyway!

What you'll need:

card stock

a book

twine

school glue stick, such as Elmer's

hole punch

Optional:

eyelets

eyelet setter

stamp and stamp pad

glue gun and glue sticks

decorative jewels and buttons

miniature doilies {found at JoAnn's}


First, print the tag template, or you can make your own. The picture of the tag above is not pictured to scale, but if you save it to a file, and then print, it will print to size.

{if you have any problems with this, you can let me know, and I will do my best to help!}


Cut the template out onto either card stock or cardboard, and trace onto the card stock you've chosen for your tag.


Trace your template onto your book page, and glue the book page cut out onto the card stock one.


Use your hole punch and loop the twine through the hole. OR you can use eyelets with an eyelet setter, as used on the tag above. (I found a great tool at Michael's called "Crop-A-Dile", that will punch two different sized holes, and set eyelets and grommets as well.)


At this point, the possibilities are endless~You can stamp your tag, or add little jewels or buttons. You can even put a little black and white picture on it. {Or you can leave it plain.} Either way, you can't go wrong!


I have two other ways I am going to decorate some of my tags, and these little additions can also be used on gift tags! I will show you these soon! :)

{Well, that's all for me tonight! My husband is looking at his watch, wondering when we are going to start watching the movie we rented!}

I hope you all have a blessed night~

~Jenni

I am linking this to "Just Something I Whipped Up" at The Girl Creative.


Tuesday, November 23, 2010

It's almost Thanksgiving...


I don't know about you, but I LOVE Thanksgiving! Now, I admit to sometimes getting a little stressed out getting every thing ready for the meal... But when I sit down with my family {and friends} and celebrate all there to be thankful for is so worth all the time spent in the kitchen preparing for it!


This past week, I have enjoyed looking at all of the Thanksgiving inspiration at the Martha Stewart website...

{And here are some wonderful Thanksgiving ideas}


Here is one I am going to do! We will be with my husband's family this year, but I am going to place one of these pear place cards at each table setting!


And how sweet is this tablescape? These whimsical photo place cards caught my eye!


Look at these mini pumpkin tapers? {I love the choice of white pumpkins!}


Yes, another pear place card! And what a beautiful centerpiece of various black and white photos!


This is such a fun kids' table!


I like this idea of grouping gourds and other vegetables together in a bowl and a simple, pretty centerpiece.


{And don't forget the pie!} Pumpkin pie is always a favorite at Thanksgiving...


This Deep-Dish Apple Pie looks amazing! Although I love to bake, I don't eat a lot of what I make...but when it comes to pie, it is a completely different story! It is one of the best parts of the Thanksgiving meal! And did you know that a slice of pie makes a delicious breakfast?


And this apple tart would make a good substitute for apple pie, if you were short on time...


But the truth is that, no matter what you choose to eat or what decorations grace your table, the most special thing about Thanksgiving is being with the ones you love. :)

I hope you have a wonderful night!

Blessings,

Jenni


Wednesday, November 17, 2010

A little giveaway...

As you know, ready or not, Christmas is coming...

the most wonderful time of the year...

but it can also be the most stressful time of the year, too!

Trying to make sure you have a special gift for every one on your list, parties to attend, baking to do, not even to mention decorating your home!

This is just one reason that I love the Gooseberry Patch bookazine that comes out at Christmas time. I found out about this last year from my friend at The Robin's Nest, and was so impressed by last year's edition!

This year's bookazine is no less amazing!


Full of gorgeous pictures and wonderful illustrations~


{what a sweet gingerbread house!}


...fantastic gift ideas~


...delicious recipes for both dinner and dessert~


...and fun craft ideas as well!

This sweet bookazine helps with all the planning that makes Christmas more relaxing and enjoyable...and much less stressful! And we would like to give a copy of this bookazine to two of you!

For a chance to win this giveaway, please just leave a comment! You don't have to have a blog, but please do leave an email address to contact you if you win!

For an extra chance to win, post about this giveaway on your blog...

For yet another chance, become a follower of this blog...but only if you like it, of course! :)

This giveaway ends Sunday, November 29, 11:59 PST. (We will announce the two winners on Monday, November 30.)

*Edited to add: We have extended this giveaway until Wednesday, December 1, 11:59 pm PST.

Have a wonderful night! :)

Blessings,


Tuesday, November 16, 2010

A winner and another giveaway...


Hello you all! This is Jenni (Sparrow) speaking, hoping you are doing well this week! :)

As you know, we have been running a giveaway the past two weeks and now it is time to announce a winner...

Thank you to everyone who took the time to enter this giveaway, and to CSN Stores for sponsoring it! :)

And without further fanfare, the winner is...

...number 64!

Now this would be where I would show you the picture of the random generator's number selection, but although I copied and saved it, I cannot upload it for some odd reason!

{So sorry about this.}

This makes Merritt the winner of this giveaway!

Blogger
Merritt
said...
What a great giveaway! There are SO many things I could use...thanks for the chance to win :)

November 12, 2010 9:03 PM

~ Congratulations, Merritt! ~

Now if you didn't win, don't lose heart! BECAUSE...

We are having another little giveaway! It isn't a huge one, but it IS something good, especially with Christmas just around the corner!

:)

{So make sure to come on back tomorrow for the scoop on this and a chance to win!} It's just a little way for us to say thank you for taking the time to come and visit us here at Beautiful Nest. :)

{Thank you.}

Well, I hope you all have a wonderful night!

Blessings,


Sunday, November 14, 2010

Clothespins meet dictionary....


I love old books, but my absolute favorite are old dictionaries...I have a soft spot for dictionaries in the first place, but there is just something about the ones with those time worn pages that I cannot resist!


Combine that with tea dyed clothespins, my latest obsession...


And you get this:


{These were such a cinch to make, and a very inexpensive craft as well!}

And just in case you'd like to make these for yourself, I thought I'd include a little tutorial...

What you'll need:

Dictionary or other book~ if you do not have an old one, a new one will work too!

Mod Podge

Clothespins~ I used both large and small ones.

Black tea, such as Lipton.

Q-tips


Now I tea dyed my clothespins, an idea my sister {Belle} saw at Nancy's Tidbits...I thought this was such a wonderful idea! To dye mine, I soaked them in black tea in a bowl for about 24 hours. (You could always omit this though and just leave them as they are if you do not want them dyed.)

Once they are dry, tear a page out of your book and find where you want to trace your clothespin...I try to avoid choosing words such as "grease" or "prison", as those sort of words do not seem quite right! That is the only thing about using a dictionary! ;)


After tracing it, cut the narrow strip of paper and bring out your decoupage glue...


I used Q-tips to cover the clothespins with the glue because they were just the perfect size. I found it took only a thin coat of the glue to adhere the paper, because it was so thin.


Put the strip of paper onto the clothespin, carefully adjusting it if needed. Smooth out any creases, and repeat this process on the other side of the clothespin! OR leave it with just one side like this...I did it both ways, and think it's cute either way! :)

{ I am going to turn some of these into fun magnets for our refrigerator!}


What do you think?

I have more "dictionary crafts" on the way...I'm kind of on a roll here...

{I am linking this to Under the Table and Dreaming.}

I hope you all had a fun and relaxing weekend! I'm never ready for Monday! How about you?

Blessings,

Jenni


{Sparrow}

Friday, November 12, 2010

Giveaway!!!! Just a reminder...


...that our giveaway, for a $35 gift certificate from CSN Stores, is coming to a close on November 15th!   


{Click Here} to enter giveaway!

Monday, November 8, 2010

Giving these photo frames...

...a new lease on life.
Here's just one of the thrifty finds I've discovered lately.


Inspired by my sister, I knew what the possibilities were when I saw these frames and it brought at the dreamer in this Southern Belle.

So far, like most of my painting projects, it's not finished.  Surprise, I know.  Its just that I am always waiting for that perfect, peaceful moment that never does quite come to paint.


{photo courtesy of my sister, Jenni}

However, hopefully in the next couple weeks, I'll be able to catch up and not only paint these thrifty finds, but turn them into something beautiful.  

belle
simply . living . life

Saturday, November 6, 2010

Sopapillas {Made Simple}

Early this summer, at a church event, I had the opportunity to eat some Sopapillas for dessert.  The Sopapillas tasted good, though obviously not authentic.  One evening not that long later, while making tacos, I decided to make some of my own.  

Here's the ingredients I used:
Mission Flour Tortillas {Burrito Size}
Olive Oil, but you can use Canola if you prefer
Cinnamon and Sugar
Vanilla Ice-cream 
Maraschino cherries

First, I heated the oil in a well-sized frying pan and fried the flour tortillas.  I then sprinkled cinnamon and sugar on them and set the tortillas out to cool and become crunchy. 


{The flour tortillas fried, sprinkled in cinnamon & sugar and cooling.}


{Vanilla ice-cream}  


{Maraschino cherries}


{Dessert prepared and ready to eat.  I thought the finished product looked like an angel.} One of these days I'll have to eat an authentic Sopapilla, but until than, this recipe will have to do and I have to say it was really simple to do.

belle
simply . living . life


Linking this recipe to the following blog parties:


Friday, November 5, 2010

From glass to chalkboard...

 UndertheTableandDreaming
{This chalkboard was featured here}

Hi everyone! I hope that your weekend is off to a fantastic start! I don't know about you, but I am SO glad it's finally Friday... :)
I want to share with you a little project I am very excited about...
I have been looking for a very large picture frame that I could use to make a chalkboard for the long, empty wall above the "island" in our kitchen. My intention was to take out the glass and replace it with the thin craft birch I use for my chalkboards...
Then about a month ago, I happened upon a blog (I cannot remember which one) where the blogger mentioned in passing a friend who had used chalkboard paint on the glass in a frame. Unfortunately, I also cannot recall the name of the friend. Alas, this means I cannot give credit where credit is due, which drives me crazy! I even googled it, but couldn't find it...but if I do, I will edit this post!
So anyhow, when I saw these frames for a steal at Goodwill a couple of weeks ago, of course I put all three in my cart!


I have plans for the other two, but knew right away one of the large ones would be a chalkboard! :)


After cleaning the glass, I placed it on my little painting table, spray priming it twice. {I used Valspar's grey primer; it is truly tough as nails!}


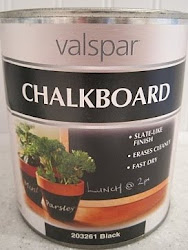
After the primer dried, I sprayed it with chalkboard paint. After two coats, I ran out of the spray paint and went to Michael's craft store to buy more.
Unfortunately, it wasn't until I got home that I noticed I'd bought green chalkboard paint.
{Please feel free to omit these past two steps. I wish I had.}
So, being rather in a hurry to complete this project, I brought out the brush-on variety...

{love this stuff!}

I did four or five coats of this, because I was putting it on glass, and wanted a strong chalkboard base.


I also primed and painted the frame white...


Carefully put the glass into the frame...


And finally it is up on the wall!


{Now when the kids wonder what is for dinner, they can look at the "menu"!}


I would ordinarily prefer it hang horizontally; however, I am working on something that will take up both sides of the chalkboard, and I need all of that space! Right now, it looks a little odd, I know- smack dab in the middle of the wall- but in the end it is going to look just perfect where it is...so stay tuned on this!


It is a little bit of a pain having to climb up on top of the "island" to write the menu, but not too much. It is worth it, because it is right where I always hoped to put a chalkboard...
And just a quick, little side note...I wanted to show you what I found at a garage sale this summer for just three dollars...


I thought my heart had stopped when I saw this metal basket. And the wood handle just about did me in. It is a reproduction, but oh how I love it!
Well, I hope you all have a fantastic weekend! Thank you so much for visiting!
Blessings,
Jenni
I am linking this to: