Dear friends, My blog has moved!
Please visit me over at my new site!


I hope to see you there!

~Jenni


Showing posts with label Before and After. Show all posts

Thursday, December 23, 2010

{Chalkboard Revisited}

A few months ago, I mentioned a project I was working on.  I knew what I wanted the finished project to look like before I began.  It just took me much longer to finish said project than I ever imagined.  

{happily ever after}

A long time ago, there was an old school chalkboard.  As a child, I used to practice my multiplication and dreaded division lessons upon it.


It used to rest upon a wall in my parents garage.


However, as the years passed and it was no longer was needed, it was removed from the wall in the garage and placed in corner space of the storage room.


Throughout the years I thought of that old school chalkboard.  Wondering where it was, and if by chance my parents still had it, and wouldn't you know they did?  What's even better is they planned to give it to me, oh yes, I was happy!  


However, to fit my motif I knew it would need a fresh coat of paint.


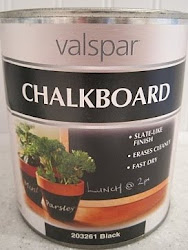
So, I purchased some chalkboard paint and began the process of painting.


 Here's a picture of the chalkboard after the first coat of paint was applied.  From that point, it ended up taking me almost three months to add the next three coats of paint.  


It is at this point, I have to say, that if it were not for my Dad, this project would still be in the garage waiting.  Thanks Dad!


While Dad cut the long pieces of molding into four pieces, that would soon make the frame for the chalkboard, I watched and learned.   So should I ever want to make another frame from molding, I will know what I am doing.


After the pieces of molding were cut to the correct size, I painted a coat of primer to the molding...


...and after that, I added a coat, of one of my many favorite shades, of brown paint, by Valspar.  


I had a bit of difficulty taking a photo that showed the updated chalkboard in all its new found glory, here is a close up.


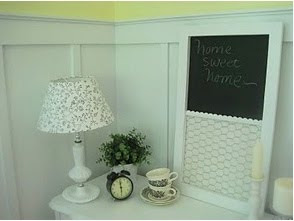
Here is a photo where you can see the entire chalkboard. 


The color of the frame is best seen in the photo above. 


So at long last, this project is, ces't fini!  This is also the point, at which, I admit painting isn't my passion.  I {Belle} think I'll go back to posting about cooking fantastic dinners and my new found passion, floral arrangement.   A big thank you to Jenni {Sparrow} for the idea of using molding for the frame and to my husband for getting that heavy piece of art on the wall and off the dining room floor.  Well, that's all for now, blessings ya'll, and Merry Christmas!

simply . living . life

Friday, November 5, 2010

From glass to chalkboard...

 UndertheTableandDreaming
{This chalkboard was featured here}

Hi everyone! I hope that your weekend is off to a fantastic start! I don't know about you, but I am SO glad it's finally Friday... :)
I want to share with you a little project I am very excited about...
I have been looking for a very large picture frame that I could use to make a chalkboard for the long, empty wall above the "island" in our kitchen. My intention was to take out the glass and replace it with the thin craft birch I use for my chalkboards...
Then about a month ago, I happened upon a blog (I cannot remember which one) where the blogger mentioned in passing a friend who had used chalkboard paint on the glass in a frame. Unfortunately, I also cannot recall the name of the friend. Alas, this means I cannot give credit where credit is due, which drives me crazy! I even googled it, but couldn't find it...but if I do, I will edit this post!
So anyhow, when I saw these frames for a steal at Goodwill a couple of weeks ago, of course I put all three in my cart!


I have plans for the other two, but knew right away one of the large ones would be a chalkboard! :)


After cleaning the glass, I placed it on my little painting table, spray priming it twice. {I used Valspar's grey primer; it is truly tough as nails!}


After the primer dried, I sprayed it with chalkboard paint. After two coats, I ran out of the spray paint and went to Michael's craft store to buy more.
Unfortunately, it wasn't until I got home that I noticed I'd bought green chalkboard paint.
{Please feel free to omit these past two steps. I wish I had.}
So, being rather in a hurry to complete this project, I brought out the brush-on variety...

{love this stuff!}

I did four or five coats of this, because I was putting it on glass, and wanted a strong chalkboard base.


I also primed and painted the frame white...


Carefully put the glass into the frame...


And finally it is up on the wall!


{Now when the kids wonder what is for dinner, they can look at the "menu"!}


I would ordinarily prefer it hang horizontally; however, I am working on something that will take up both sides of the chalkboard, and I need all of that space! Right now, it looks a little odd, I know- smack dab in the middle of the wall- but in the end it is going to look just perfect where it is...so stay tuned on this!


It is a little bit of a pain having to climb up on top of the "island" to write the menu, but not too much. It is worth it, because it is right where I always hoped to put a chalkboard...
And just a quick, little side note...I wanted to show you what I found at a garage sale this summer for just three dollars...


I thought my heart had stopped when I saw this metal basket. And the wood handle just about did me in. It is a reproduction, but oh how I love it!
Well, I hope you all have a fantastic weekend! Thank you so much for visiting!
Blessings,
Jenni
I am linking this to:

Monday, November 1, 2010

Twiggy Wreath

UndertheTableandDreaming
{This wreath was featured here}

How to make a {simple} Twiggy Wreath. I first got the idea of making a twiggy wreath while visiting family. I researched a bit and discovered these wreaths can cost anywhere from $25 and above. Since I wasn't about to pay that much I decided to make my own.

First I purchased an ordinary wreath for about $3.00.


I then began to add small twigs, which I happened to find in our yard. {Yes, that would be my thrifty find.}


All I did was fit small twigs within the purchased wreath. {I wasn't joking when I said this project was simple.} This picture was taken halfway through the project.


Voila, a Twiggy Wreath and although mine doesn't look exactly like the wreath I first saw, its close enough. I might add more twigs and see if it improves the fullness of the wreath in the days to come. I didn't intend to add anything else to the wreath as I liked the earthy-ness of it, but thought about adding a sign to it that says something for each season or holiday.

So, finally, I am catching up on my projects. Hooray!

belle
simply . living . life

linking to the following blog events:


Stinkin Cute Thursday Button
NightOwlCrafting

Funky Junk Interiors
Perfectly Imperfect
and Under the Table and Dreaming.

Wednesday, September 29, 2010

Painted kitchen window


If you can't replace it, paint it!
This has become my motto...well, one of them anyway! :)
When we first moved into our fixer-upper home eight years ago, we immediately brought out the paint brushes. As many of you know, paint is truly one of the most affordable ways to update an old, neglected home, second only to a complete scrubbing! :) I have come to believe that there is very little that cannot be painted! Walls, floors, fireplaces, windows...yes, windows. Think very ugly, old aluminum windows.
Windows like this:


This was our sad garden window, last fall. We realized we weren't going to be able to replace it as soon as we'd hoped.

As you can see, I was in the process of putting the bead board up, and I knew with all of that painted white, that dark window frame would stick out like a sore thumb!


See what I mean? It was driving me crazy! BUT...when my husband half-jokingly suggested I paint it, I gave it some serious thought...and decided why not? I had never heard of doing it before, but that didn't mean it couldn't be done successfully, right? At least, that's what I hoped...
So I started with the bottom "shelf" of the garden window, figuring it it started going badly, I could stop with that and it wouldn't look too strange! :) I primed it twice and painted it, and all went well. So I taped around the window frame so I wouldn't get paint on the glass, and primed and painted until it looked like this...


I was pleased with the results, after all was said and done!
Now, a few weeks ago, I noticed there were some spots on the window that I needed to touch up. And one thing led to another, and I kind of ended up touching up the whole thing...
{But if you are thinking of trying this, don't worry, you won't have to repaint it every year! That is just me being a total perfectionist!}

{In this picture, versus the previous one, you can see the window and cabinets are trimmed out now.}

But now I am DONE. For real. And to celebrate, I even sewed a curtain valance!
And it turned out almost how I'd imagined. I didn't want a seam on the bottom, but I couldn't figure out a way to avoid it, so there it is. And this I am not touching up! ;)


{The ribbons are easy enough to remove if I want a different color at some point.}


Now I am almost done with this project...this one I have had half done since January! (This is a picture from then.)


I hope to show you the "after" picture next week! I think it's a success, but this was much more tricky than the window, so I am going to breathe a sigh of relief when it's done!
Well, I hope you all have a wonderful day and a great weekend!

Blessings,
Jenni

Linking to the following blog parties:

Friday, August 27, 2010

Vintage School Desk {Transformed}

A big thank you to Stephanie Lynn at Under the Table and Dreaming & Shauna at Perfectly Imperfect for featuring my school desk!
 UndertheTableandDreamingPhotobucket


When I was a teenager my mom was given two of these desks.


I never thought they were that pretty as they were. As the years went by, I wondered what it would be like to have them and transform them into something pretty.


Not long ago, I noticed the desks were still in my parents' garage and asked my parents if they had plans for them. {Hint, hint...If you'd like, I'd love to give these beauties a new home.} Ends up my Dad was thrilled to get rid of them. {Gives him more space for his tractor and tools!}


So far, I've only transformed one desk...

Step one was cleaning and sanding...


Second step was painting the desk with white primer paint. {Over and over again...}


Third step was painting the color I discovered for .50 cents at Lowe's on their clearance aisle. The minute I saw this small can of paint I knew it was love! Both the price and shade were right. The paint color you ask? That would be,Woodlawn Colonial Gray Satin, by Valspar.


I've always loved chalkboard paint. While sanding this desk I got to thinking. What would be better on a school desk than a permanent chalkboard? Nothing that I could think of so...


...I painted some on a well sized square of the desk.


Still the desk wasn't "complete." I noticed a sweet stamp in my Mom's office and asked if I could "borrow" it. She said that would be fine.

{I love my Mom!}


I think this little design adds to the desk. What do you think?
I used chalkboard paint, because well, it's what I had on hand. Literally.


So are you ready to see the new improved school desk?


Painting tape removed around the chalkboard...


...voila! A {vintage} school desk transformed!


Lower shelf ready for school books...


All that's needed now is some chalk, but not for 24 hours until the last coat of chalkboard paint has time to dry.
{waiting, once again. taps foot impatiently...}


{It's love}


belle
simply . living . life


I am linking this desk to the following parties...

Perfectly Imperfect 
C.R.A.F.T 
Under the Table and Dreaming
Domestically Speaking 
Shabby Nest
Tatertots & Jello