Dear friends, My blog has moved!
Please visit me over at my new site!


I hope to see you there!

~Jenni


Sunday, October 30, 2011

{The Winners of the Giveaway}

 Hello friends! I hope you are each doing well tonight! :)
Last night marked the end of our giveaway here at Beautiful Nest, and it's time to announce the winners of the new Gooseberry Patch bookazine:


 Drum roll please...

The first winner is Lisa, the 23rd entry:


Lisa said...
I love the magic it still holds over my kids! I love the lights on trees and houses. I especially love the 25 days of Christmas shows on TBS!!
October 20, 2011 4:49 AM


 The second winner is Amber, the 25th entry:


Amber M. said...
You're back on my sidebar...HOORAY!
October 20, 2011 4:53 AM

Congratulations Lisa and Amber! Please email me with your addresses, and I will get those bookazines off to you both this week! :)

I hope you have a good night and a fun and happy Halloween! We have one cat, one mouse, and...a vampire
{deep sigh inserted here}
I am not extremely excited about that particular costume! Our son has been wanting to be a vampire for a while now. I suspect it will be his last year of dressing up, so I relented. I couldn't talk him into being a vampire bat like I did last year! ;)

{Oh dear!}

Blessings,
Jenni

Belle & Sparrow

Tuesday, October 18, 2011

Fresh Flowers and an update

 Hello friends!

{I hope this finds you having a lovely week so far!}

We have been enjoying sunshine so far this week, and I'm crossing my fingers we might have some tomorrow, too! :)

 I was shopping for our groceries today, and brought home fresh flowers, as I do most every week.

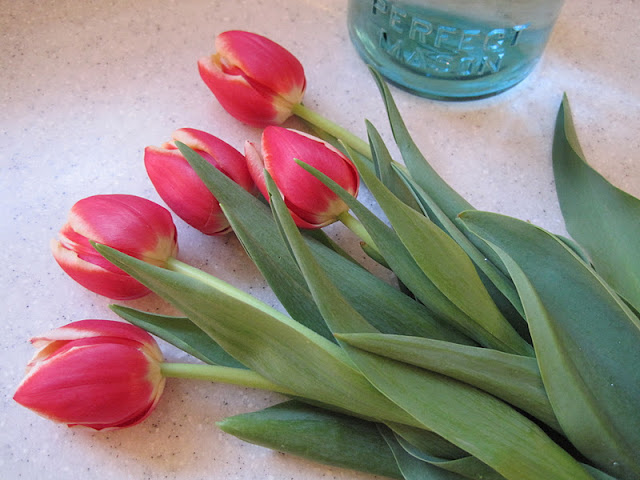
 And I know it isn't spring, but I brought home tulips. If the truth be told, I usually buy tulips, all year round if they have them for sale! Even just a single bunch can make a big impact in any room, and the tulip's large leaves fill the vase with greenery.

 
 Between the sunshine and the tulips, it's like having a little spring again! :)

I continue to work away in the master bedroom, but am still not finished! I put a coat of pure white chalk paint on the fireplace as planned, but although I love the paint/color, it didn't seem right on the fireplace. So I am going to try Sherwin-Williams extra white in satin next, and see if that works better! You are probably wondering if I'll ever finish this room! {I am too!} ;) I hope to have something to show you soon!

Oh, and if you haven't entered our giveaway, you can do that here. We are giving away two copies of Gooseberry Patch's annual Christmas bookazine! :)

I hope you have a good night!

Blessings,
Jenni
{belle & sparrow}

Sunday, October 16, 2011

It's time for a giveaway! { Gooseberry Patch Bookazines}

Hi dear friends! 

{I hope your weekend was a lovely one!}

I don't know about you, but I'm thinking it is time for a giveaway! It has been a while since we have done one, but we have a few of them up our sleeve now! :)
Once it is October, my thoughts always turn to Christmas...what we will be giving to our family and friends for Christmas, what recipes I want to bake, decorations I'd like to make...


And seriously, I have not found a better go-to for all of this than Gooseberry Patch's annual Christmas bookazine. No matter what your interest is, this is guaranteed to please!

There are gorgeous gift ideas


as well as sweet crafts you can decorate your own home with.

And whether you enjoy cooking like my sister Belle,


or are like me, and prefer baking,


there are wonderful looking recipes for either!


Oh, and aprons! Just when I thought it could not get any better...


Have I ever told you how much I love vintage aprons {or their look-alikes!}?

Patterns are included in the back of the bookazine! I can't decide which apron is cuter...

So, because I love and enjoy this Christmas bookazine so, we must share it with you! 

Actually, we have TWO copies of it to share!

For your chance to win, just leave a comment and tell us what you love most about Christmas!

For an extra chance to win, post about this on your blog or add it to your sidebar!

And if you would like even more chances to win, just mention this giveaway and/or tweet about it! 

{Please make sure to leave a comment for each thing you do!}

You do not have to have a blog to join in on this, but please do leave a way for us to contact you should you win! :)

Contest ends: midnight PST, on Sunday, October 30th, and we will announce the winners that day!
 
 I hope you each have a beautiful Monday!

Blessings,
{Jenni}
   
Belle & Sparrow

Tuesday, October 11, 2011

Tutorial: Making Miniature Doily Flowers

Hello sweet friends! I hope this finds you having a beautiful day! :)

Now in the last post, I shared a yarn wreath with flowers made from doilies, and promised a tutorial on how to make them.


 Although making these flowers is fairly straightforward, I found that showing it by photos was not. It is a wee bit tricky to show what is going on, but it is not a difficult flower to make. I took some pictures over, so you will notice background changes here and there! But if you'll bear with me, I think we can make a go of it!
;)


For these {miniature doily flowers} you will need small doilies~ I used ones that measured about three inches diameter. But if you cannot find them this small, you can always use some that are just a little bigger, and still achieve this look. :)

To begin, lay your first doily out.


{Lay your second doily on top, but rotate it slightly from the one on bottom. This will give it a more layered, flowered look.}


With matching thread,


 begin sewing, starting at one point on the tiny "circle" in the center of the doily, and sewing completely around it. Remember to make a double knot at both the beginning and end of this process, so the stitching won't pull out!


{Now if you haven't done this before, I will tell you what I do. I can't claim this is what a true seamstress would do, but it is what works for me.} :)


To make your double knot, sew from the top doily down to the bottom doily, then pull your needle back up out of the top doily again, but only just. Meaning do not pull the thread all the way back out to the top, just the needle itself: when you look underneath your doilies, you should see a little "loop" of sorts.  Now turn your needle back down, pushing it down through the two doilies, and through the loop, pulling your thread tight. 


Once you repeat this, you will have your double knot. If you are a worried sew(er) like I am, {versus a sewer} you might even do it three times, and then you really know it won't come loose! ;) This is the same process for ending your stitch when you come to the end of the little circle!


Then take the middle of each "petal" on the top doily and sew it, making a knot onto the part of the doily behind it, that little "dip" between each of the two petals on the bottom doily, right here:


Continue to do this with each middle between the petals of the top doily, until you have made your way around the doily and all knots are tight!

To make the top flowered part {that goes on top of the two doilies you just sewed together} you take one doily,


 fold it in half,


then in half again. But when you open it just a little, it should look like this:


You want that part you see in the center to be the middle of your flower. To get this, bring the top and bottom of the right side of the folded doily together. Adjust the "center" part as needed until it is square in the middle of your "flower", like this:


You will need to sew the flower closed, by sewing on both the left and right side. On the right, there will be a gap down the side. Sew down the side of the flower {just to the right of where I am pinching together the very "center" fold of the flower}.


 {If you look closely, you can see where my needle is starting: just to the right, and underneath of, the "center" I'm holding with my fingers. You don't want to sew the "center" together, just beneath it to the side, and down to the bottom of the gap.}


This is a side view of the "gap" you are sewing together. You can also sew it from top to bottom, if that is easier.}


Once you are done with the right side, you will need to sew the other side of your flower.


So let's take a look at it again:


Bring the "dip" between the two outer "petals" on the left side together with the dip between the two inner petals on that same side, and make firm knot right in the center of those "dips". This is where I do several knots, actually! You will need more than just two here!


{Now the top part of your flower is done, but you will need to sew it onto the other part now.}


Center it onto the other doilies you sewed together, and sew down through the top of each corner of the four petals {of the top part of your flower} making firm knots until secure.


Now for extra fullness, I took that "dip" between the two petals on the top part of the flower, and brought it together with that little dip between the top two petals on the middle part of the flower. I knotted it there. Then I did the exact same thing with the bottom of the flower,
bringing that little part between the two petals on both the top and middle layers together and stitching tightly.


And back to this picture, because this is what you have:


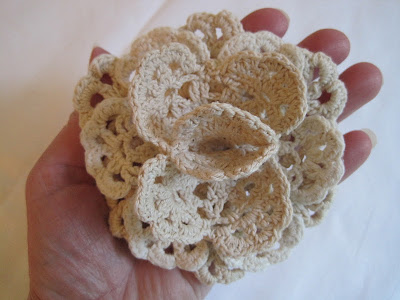
{A little crocheted doily flower!}


If you would like the how to on making this wreath, you can find that here!


I realize this is not the perfect tutorial, so if you want to make one of these flowers, but have any questions, please let me know! :)


Thanks so much for coming by for a visit, and I hope you have a great Wednesday!


Have a good night~

Jenni
 

Sunday, October 9, 2011

Doily Flowers + Yarn Wreath


 Happy Sunday to you!

Was your weekend a good one? I hope it was!

I want first to thank you for your comments on my last post~ they each meant so much to me! They truly did motivate me this weekend, and we got a lot done on the master bedroom. I feel so much better now, even about the plank ceiling! Somehow, it looks better to my eyes than it did before! So thank you for the extra push in the right direction! :)

Secondly...


Since I am finally in the mood to finish up projects, {wink} I decided I might as well finish this little project, too...Something else I'd started weeks ago, and not finished...


Partly because I am a perfectionist,

{I hear you say, "No,really!?"}


and partly because I wanted to get the doily flowers right... 


{pearl corsage pins hold the first two miniature doilies in place; they were put in an angle to avoid any sharp points poking out!}


{one doily flower}


 {a straight pin pushed down in the center of the "flower" holds it firmly in place, and a corsage pin was used next as functional decoration}


To start, I just used a white styrofoam wreath form, and wrapped the yarn around and around until it was covered...just as you would with any yarn wreath. :)


{I realized this would be a good thing to do when watching a movie...}


I decided where the lace that would hang the wreath would go...hot glue works great for this!


 And also decided I wanted my "flowers" off center on both sides.


Something about the warmness and sturdiness of the yarn with the delicate crocheted pieces just complemented each other...


Now I must confess...after repainting our living room last winter, I am still in the process of decorating the walls/deciding what I want! SO...I cheated a little here by only really showing the wreath by itself. This room is definitely a work in progress!


I will be back tomorrow with a little tutorial on making the doily flowers, just in case any one would like to make one!

{I am linking this to:

The Sunday Showcase Party at Under the Table and Dreaming 
Air Your Laundry textile party at Freckled Laundry
The Weekend Wrap Up Party at Tatertots and Jello 
Frugal Friday at The Shabby Nest


I hope you have a wonderful night, and a lovely Monday! :)


Thank you for stopping by~


Jenni