Its time for our Fun Family Feature here at Beautiful Nest. Once a month Sparrow and I will feature a fellow blogger who has a fun family craft, dessert, etc... This month we're featuring,
Life With {The Cuties}. When
I saw the terrific idea,
here,
seen below, I knew I had to make some of these cute bats.
The Monkey's Mama got this great idea from her daughters school and decided to make some of her own.
Now, quiet honestly, I've never thought bats were cute. Creepy yes, cute no. However, like the Monkeys Mama said, making the bats provides an opportunity to teach our little ones about bats, read them books, etc.
Interested in making a last minute craft for the weekend? Well lets get started. Be sure to stop by,
Life With {The Cuties} to see her tutorial as ours are slightly different--mainly because I didn't have all the supplies she mentioned on hand.
What you'll need and what I used.
soda cans {clean and dry}
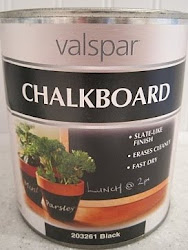
black paint {or in my case chalkboard paint}
black construction paper
brown or black ribbon
large needle
googly eyes
tape {because I couldn't find my hot glue gun}
soda cans.
bend can 1/4 way down.
paint soda cans with black paint.
take construction paper and fold lengthwise.
make a bat wing pattern.
cut out as many pairs of wings, you'll need for your project.
I used tape to reinforce the bat wings.
make a small hole in the wing pattern.
take ribbon and place threw needle.
now poke holes in soda can a small distance apart. pull ribbon threw both openings.
double tie a knot with your ribbon.
now slide the ribbon through the small hole on the bat wings and secure by tying another knot with the ribbon. I also chose to add two pieces of tape to each side of the wings, close to the ribbon, for added security.
add googly eyes.
seeing the left over soda can tab on the table I wondered if I could possibly use it in the project. I could! I took the tabs and placed them at the end of the ribbon so I could hang the bats up easily.
since I used chalkboard paint I decided to name our cute bats. Of course, one of the bats was named Boo and since our favorite bedtime story book is, Moo, Bah, La, La, La, we named the other three bats, Moo, Bah and Lah.
So, what do you think, is he cute?
Voila!
belle
simply . living . life
i linked this to the following blog parties,


.jpg)


