Dear friends, My blog has moved!
Please visit me over at my new site!


I hope to see you there!

~Jenni


Saturday, September 11, 2010

Nine years ago today...


(September 11, 2001)

Every one of us remembers where we were and what we were doing when we first heard. We remember the shock and grief, the fear, the loss of life.

Especially the loss of life. That is the hardest part of it.

I promise I will not forget.


~Jenni


Wednesday, September 8, 2010

Something old...

...something new.

So Sparrow's been holding down the fort here at {Beautiful Nest} for awhile, so I decided to jump in and show you all one of the projects I've been working on.

Now since I have four little ones, five years old and younger, from start to finish my projects tend to take ten times longer than my sister, Sparrow's. Good news is she assures me in time that as the kids grow I will be able to accomplish things faster.

I hope so.

Since it took me all day to clean the house. My really little house!

Though this before and after project isn't complete yet, I thought I would share with you a glimpse of what it is and what I hope it will become.

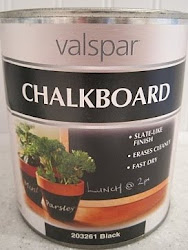
Now by now, you probably know I adore chalkboard paint! As a momma of little ones I also love the idea of having a wall my kids can scribble upon. Seriously what's not to love? However since we rent and do not own, I can't very well paint the walls so what's a girl to do?


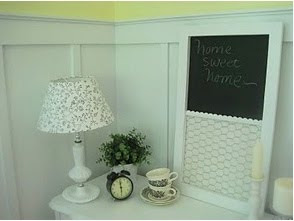
When I was younger this chalkboard was mine and my parents recently gave it to me. {Neat aye?} My first thought was oh my goodness, I know exactly what I can do with this!

Now in my upcoming post I share details, details, details, but this post is like a trailer for a movie. Its just a juicy snippet of what's to come. So without further ado...my project.


After I finish painting this, me and the chalkboard are on our way to Sparrow's where she will show me how to add the finishing touches.

Thank the Lord for sisters!

So...did reading this inspire you to come back to see the the transformation? I sure hope so. In the meantime I hope you all have a fantastic week. Blessings!

belle
simply . living . life

Tuesday, September 7, 2010

The giveaway winner announced!

First of all, we want to say thank you to all of you who entered our giveaway here at Beautiful Nest! And thank you again to CSN Stores, for sponsoring this generous giveaway!

As our giveaway ended last night, it is time to announce a winner! I printed out all of your entries, and put them inside a basket...


I handed the basket to my husband, who mixed up the entries a bit...


He picked out a slip of paper, and handed it to me. And the winner is...


...Tricia from Notes of Sincerity! Congratulations, Tricia! You win the $40 gift certificate to CNS Stores!
:)

Now for those of you who didn't win, don't lose heart! You will have another chance to win a giveaway! Actually, two chances!

Here's the deal:

Come back next Monday, September 13, for another giveaway! This one is sponsored by us, and the theme is "Autumn".

Then, after entering the giveaway here, be sure and stop by Nest to Keep (Jenni's other blog) next for a second giveaway, with "Cottage Kitchen" as it's theme! Both giveaways will start on the 13th!

And as always, thank you all so much for stopping by for a visit! Have a wonderful night!

Blessings,

Monday, September 6, 2010

In the living room: The fireplace

Getting Real
I was originally thinking that I should call this post The good, the bad and the ugly. But I changed my mind. ;) Although, I will forewarn you~ you will see a little of all of the above, especially the latter two!
As I have mentioned before, when we bought our house, it was VERY unloved and neglected. It was the epitome of "fixer-upper". It has taken so much work to even get it to this point, but we aren't even close to finished!
I will admit, there are some good things about this room.
The windows were finally replaced last summer. No more feeling a draft while standing by the old ones!

(Here is David, installing one of the two large windows.)

My husband put the wide trim around them and made new wider window sills.


(Mid project)

(After- Oops, I see that spot I need to caulk!)
And I did a board and batten in the room and painted it and all of the trim white by Benjamin Moore. I followed a tutorial for this project at It's the little things that make a house a home. This blog also inspired my new window sills!


(Priming the "board" and batten.)


Then made a mistake and painted the walls yellow.


(Picture shown in a previous post.)

David built this "hearth box" last spring, but I have only primed it so far! I still have to add decorative trim and paint it!


So far we have also:
  1. Removed "popcorn" texture from ceiling.
  2. Replaced the baseboard heater.
  3. Replaced carpet.
  4. Added baseboard molding.
  5. Painted fireplace; added mantel.
Now as I am almost finished with our kitchen, I have been working on and off in the living room, and planning upcoming projects in this room. I hauled out a lot of the decorations and some of the furniture so you could more easily see the room itself.
I finished painting over the yellow walls, in simply white.


In this picture you can see a little of the very slight contrast between the simply white and the crisper white on bottom. I am still fluctuating between keeping this color and repainting it in moonlight white, pictured next to simply white in the paint swatch. My worry is that it will be too "brown" a tone of white, and clash with the gray accents I am adding to the room. What do you think? Which color would be best? Does the board and batten need more of a contrast?

Now to give you an idea of the layout:


The room facing the fireplace; the kitchen is off to the left.


Coming into the room from the back hall.


(I know, a ridiculously small mirror there in the middle of the mantel!)
Do you see that massive brick fireplace? This is part of the problem. I like brick, but this is overwhelming!


But the truly glaring problem is that the brick is not symmetrical around the hearth. This drives me crazy!

I have always planned on doing something about it, but the only workable plan I could come up with was to remove the extra brick from the right side and put up drywall. A really big job with high risk for total failure. Done by me, who wouldn't know what in the world I was doing...

Then a couple of weeks ago, while staring at this fireplace, I came up with a much more workable plan:


Instead of removing brick, I will add a vertical strip of wood to the left side ( where the arrow is). I'll make a wood "frame" that will screw into the brick, as well as attach to the strip of wood on the left side.


(Click to enlarge.)

I'll cover the brick in the dotted area with either bead board, birch plywood, or MDF, screwing this onto my "frame". (If I use plywood or MDF, I will use trim on it as an accent, although I am leaving heavily toward using bead board right now.)
Thankfully, my husband knows how to do this properly, and can teach me as I go!


The goal is to start this project at the beginning of October, but we'll see!
Any thoughts on this plan, or on my paint color dilemma?

I hope I haven't bored you out of your mind! If I haven't, you can come back next time, when I show pictures and my plans for the other two parts of this room! :)

Thanks so much for taking the time to visit!

Blessings,
Jenni

Tuesday, August 31, 2010

Bead board in the cabinets: Choosing a color

It's not as easy as it seems. [Of course, this is coming from someone who tends to make everything hard, but that is another topic all together!]

But truly, there is something daunting about picking out paint, especially for certain projects. You know, the kind where you want it to be *perfect*. For some reason, every project in my kitchen renovation has fallen into this category. Actually, if I were to be totally and completely honest, everything in my life falls into this category...but please tell me that there is someone else out there who agonizes over paint colors like this!

It all started very innocently:

I put bead board on the inside back of our upper kitchen cabinets, and painted them the same pistachio green that I painted the wall. It was exactly what I wanted.

Until I started thinking that I needed a white paint color on the walls instead, which I repainted a creamy white hue. And maybe I would have left the bead board like it was, but then when I painted our kitchen floor, I chose this very grayish green color:


I wasn't sure it matched the light green, but I chose it because it was the completely right color for our floor. [I know this is true, because the countless other samples I tried were not the right ones.] And I loved the way it looked, and David agreed.

Just one problem~ the clash between it and the pistachio was giving me a headache.

So we went from this:


(Cabinet by stove; first green)


To this:


(Cabinet by sink; new green)


To this:


(Cabinet with things inside of it again! Yea!)


This picture shows the floor color better, and a little bit of the cabinet by the sink. No more clashing now! :)


(Picture disclaimer: I still haven't sewn a sink skirt, and I left the drawer open because the drawer front was freshly painted!)


In the end, I realized the grayish green on the floor would work for the bead board. And if I want to repaint it someday, I can. Besides, the floor is technically a temporary fix anyway!


Well, thanks so much for stopping by and listening to my ramblings! I hope your week is going well! Oh, and if you haven't entered our giveaway, be sure to check it out here!

Have a beautiful day!

~Jenni


Friday, August 27, 2010

Our first giveaway!


{This giveaway is now closed.}


Hello everyone!

We are so excited to be having our first giveaway here at Beautiful Nest!
CSN Stores is the generous sponsor of this giveaway. This means that one of you will be the lucky winner of a $40 gift certificate! It can be used at any one of their over 200 online stores, which offer just about anything you could imagine!
Now I have been particularly taken by their wide variety of kitchen items, which include the fabulous Le Creuset brand!
If you are like me, there is always something on your kitchen wish list...


And almost always a need or two!


And now, many of the necessary items in your kitchen can be beautiful as well as functional, such as this amazing bakeware set...I just love the color!


This caught my eye as well...


How sweet are these? Baking muffins would be twice the fun when using this muffin pan with silicone liners!


Be sure to visit http://www.csnstores.com/ourstores.asp and check out all the wonderful things sold there!

So here are the rules for this giveaway:
You absolutely do not have to have a blog to enter! :)
This giveaway is only open to US and Canadian readers. Any orders that are shipped to Canada may incur extra shipping charges.
For one chance to win, simply leave a comment!
For an extra chance, become a follower of this blog. ;) Or if you already follow this blog, let us know you do!
And IF you so desire a third chance, post about this giveaway on your blog!
Be sure to leave a comment for each thing you do, so we know to add your name multiple times!
This giveaway will run from today {Friday, August 27} until Monday September 6, at midnight PST! We will draw one name from a basket that day, and let you know who the lucky winner is!
As always, thanks so much for stopping by for a visit!


*Disclaimer: We are in no way compensated for hosting this giveaway.

Vintage School Desk {Transformed}

A big thank you to Stephanie Lynn at Under the Table and Dreaming & Shauna at Perfectly Imperfect for featuring my school desk!
 UndertheTableandDreamingPhotobucket


When I was a teenager my mom was given two of these desks.


I never thought they were that pretty as they were. As the years went by, I wondered what it would be like to have them and transform them into something pretty.


Not long ago, I noticed the desks were still in my parents' garage and asked my parents if they had plans for them. {Hint, hint...If you'd like, I'd love to give these beauties a new home.} Ends up my Dad was thrilled to get rid of them. {Gives him more space for his tractor and tools!}


So far, I've only transformed one desk...

Step one was cleaning and sanding...


Second step was painting the desk with white primer paint. {Over and over again...}


Third step was painting the color I discovered for .50 cents at Lowe's on their clearance aisle. The minute I saw this small can of paint I knew it was love! Both the price and shade were right. The paint color you ask? That would be,Woodlawn Colonial Gray Satin, by Valspar.


I've always loved chalkboard paint. While sanding this desk I got to thinking. What would be better on a school desk than a permanent chalkboard? Nothing that I could think of so...


...I painted some on a well sized square of the desk.


Still the desk wasn't "complete." I noticed a sweet stamp in my Mom's office and asked if I could "borrow" it. She said that would be fine.

{I love my Mom!}


I think this little design adds to the desk. What do you think?
I used chalkboard paint, because well, it's what I had on hand. Literally.


So are you ready to see the new improved school desk?


Painting tape removed around the chalkboard...


...voila! A {vintage} school desk transformed!


Lower shelf ready for school books...


All that's needed now is some chalk, but not for 24 hours until the last coat of chalkboard paint has time to dry.
{waiting, once again. taps foot impatiently...}


{It's love}


belle
simply . living . life


I am linking this desk to the following parties...

Perfectly Imperfect 
C.R.A.F.T 
Under the Table and Dreaming
Domestically Speaking 
Shabby Nest
Tatertots & Jello